
11. Persons
Not everything moving you meet along the way needs to be hostile to your character. You can also add persons, people (or something else) that you can talk to and/or trade with. You might anger these persons, at which point they can become enemies if you allow this in your game.
We'll add a friend to the game, who is present at your start location. Create a new person called Friend using the StoryScript Create Person command:
npm run scp FriendThe HTML file of a person is very important for persons, as you'll define the conversations you have with them here.
Add the friend to the Start.ts file, below the destinations:
persons: [
    Friend()
]
Let's call the friend Joe by changing the name property in the Friend.ts file. Joe is now present at the Start location. You can either talk to him or attack him! If you don't want to be able to attack Joe, set the canAttack property to false. The attack button will then disappear.
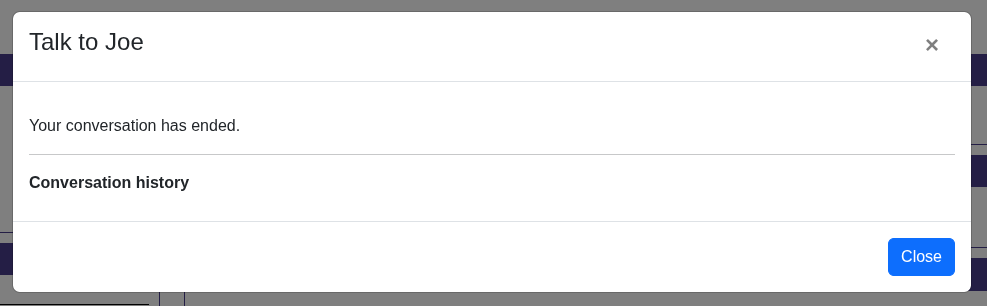
Try talk to Joe. As you haven't given him any lines yet, he has not much to say:
Conversations
Making Joe a bit more of a conversationalist is the next step. You can interact with persons in more ways, by trading with them or doing assignments (quests) for them. These will be covered later in this tutorial as well.
Joe's lines and the replies the player character has available are specified in the friend.html file. Let's start with something simple and add this code to the file. Use the ssConversation, ssNode and ssReply snippets to do this:
<conversation>
    <default-reply>
    </default-reply>
    <node name="hello">
        <p>
            Hello there. How are you doing today?
        </p>
        <replies>
            <reply node="fine">
                Fine, thanks.
            </reply>
        </replies>
    </node>
    <node name="fine">
        <p>
            Good. What are you up to today?
        </p>
    </node>
</conversation>
A conversation is made up of nodes. Within a node, you can use all the HTML you want to create a colourful discussion. This html makes up the lines of the person. You create replies that the player character can use as a response by adding the special <replies> tag and adding child <reply> elements for each available reply.
You can see that there are two nodes in this conversation, and they both have a name. This is very important, as that name is used to link the nodes to each other to create a conversation flow. As you first speak to a person, the engine has a number of ways to determine the node to start with. As we have specified nothing special, the first node, named 'hello', will be used.
So, when you first talk to Joe, he'll ask how you are doing. You can see there is just one reply available right now, saying 'Fine, thanks'. Also, you can see that this reply has an attribute called 'node'. This is used to move to a new node when using that reply. You can see that the name of the node to go to is specified, 'fine'. So selecting this reply will make Joe go on with his lines in the 'fine' node.
Talk to Joe again, choosing the only reply options available right now. The conversation should go like this:

You see that the words exchanged are logged, so you can always review what's been said in case you forget.
You can add in a reply that is available to everything a person has to say by specifying a default response, which will allow you to end the conversation a bit less abruptly:
<default-reply>
	Never mind. See you later.
</default-reply>IMPORTANT: if you set a new start node (see below), this will only work when you end the conversation by selecting a reply that has no “node” attribute! If you use the default-reply in the conversation (it should have some text!), such a reply will be added for you.
Great, some interactivity! You can expand on this conversation by adding additional nodes and replies linking to these nodes to get a basic conversation going. That's nice, but it wouldn't it be great if the conversation is actually influenced by the things going on in the world around you? Of course, we have some options to do this (otherwise it would not make for much of an interactive story). They are:
- Setting a new start node, so the conversation does not start all over again when you re-visit your friend.
- Making replies conditionally available. For example, you could require the character to be witty enough in order to make some remarks.
- Triggering an action when you reply in a certain way.
- Linking your replies to quests.
Let's first change what Joe has to say when we talk to him again to make him a bit less of an automaton. We do this by adding the 'set-start' attribute to the first reply and adding a new node for his new lines like this:
<node name="hello">
	<p>
		Hello there. How are you doing today?
	</p>
	<replies>
		<reply node="fine" set-start="return">
		Fine, thanks.
		</reply>
	</replies>
</node>
<node name="fine">
	<p>
		Good. What are you up to today?
	</p>
</node>
<node name="return">
	<p>
		Back so soon?
	</p>
</node>
When you now return to Joe, he should have something new in store.
Having replies available only when certain conditions are met is when conversations are getting more interesting and more attuned to what goes on in the game world. For this, you can set the 'requires' attribute on a reply node. You can require several things:
- That the player character meet an attribute threshold, e.g. he should be smart enough to talk about relativity. The syntax for this is: requires=”[attribute]=[value]”, e.g. requires=”intelligence=3”.
- That the player has a special item with him. Use requires=”item=[itemId]”, e.g. requires=”item=sword” for this.
- That the player visited a certain location: requires=”location=[locationId]”, e.g. requires=”location=garden”.
- That the player has started, meets the requirements to complete or completed a quest. We'll discuss these later.
We'll add an example of the first three requirements to our conversation:
<node name="hello">
	<p>
		Hello there. How are you doing today?
	</p>
	<replies>
		<reply node="fine" set-start="return">
			Fine, thanks.
		</reply>
		<reply node="workout" requires="strength=3" set-start="return">
			Great. I have just completed my workout.
		</reply>
	</replies>
</node>
<node name="return">
	<p>
		Back so soon?
	</p>
	<replies>
		<reply node="garden" requires="location=garden">
			I just walked through the garden.
		</reply>
		<reply node="key" requires="item=basementkey">
			I found a key.
		</reply>
	</replies>
</node>
<node name="fine">
	<p>
		Good. What are you up to today?
	</p>
</node>
<node name="workout">
	<p>
		I can see that.
	</p>
</node>
<node name="garden">
	<p>
		Did you see the hedgehog?
	</p>
	<replies>
		<reply>
			No I didn't. I'll pay attention next time.
		</reply>
	</replies>
</node>
<node name="key">
	<p>
		Hm. I don't know what lock that's for.
	</p>
</node>
For your character to meet the strength requirement, you should select the first answer to both questions when creating a character. Go to the garden to talk to Joe about its inhabitants.
Try these requirements. Replies that you do not yet qualify for should be hidden from you. If you want them to show but unselectable, set the flag on the conversation in the .ts file like this:
conversation: {
    showUnavailableReplies: true
}
You can also trigger actions on selecting a specific reply. For this to work, you need to use the 'trigger' attribute with the name of the action to trigger on the reply in the .html file. The actual action you specify in the action collection on the conversation element in the .ts file. Let's create an example. There is a hedgehog in the garden, but unless Joe told you about it you will not see it. To make this work, we add the trigger first in the Friend.html file:
<node name="garden">
	<p>
		Did you see the hedgehog?
	</p>
	<replies>
		<reply trigger="addHedgehog">
			No I didn't. I'll pay attention next time.
		</reply>
	</replies>
</node>
Second, we specify what the addHedgehog function does in the Friend.ts file, using the ssConversationAction snippet:
conversation: {
	actions: [[
		'addHedgehog', (game: IGame, _: IPerson) => {
			const garden = game.locations.get(Garden);
			garden.hasVisited = false;

			garden.enterEvents.add(['Hedgehog', (game: IGame) => {
				game.logToLocationLog('Ah! There is the hedgehog Joe was talking about.');
			}]);
		}
	]]
}
Note that I use a few tricks here to make this work. Events are run the first time the player visits a location, so I reset the hasVisited flag on the Garden location first. Then, I add the new event to the Garden, writing a simple message to the location log (enter and leave events are removed after they complete, hence there is no need to clean up the squirrel event that we defined before).
Now, when you visit the garden, talk to Joe about it and return to the garden, you should see the hedgehog. However, when you then return to Joe, you can again use the 'I just walked through the garden' reply. You can make replies available for use just once like this:
<reply node="garden" requires="location=garden" once="true">
	I just walked through the garden.
</reply>
Quests
In any kind of story, the main character has to run errands or do favours. In StoryScript, these can be created as quests. Let's add a little something we can do for Joe. Joe has misplaced his personal journal and he would really like to have it back. You can help him find it. Create a new quest called Journal using the StoryScript Create Quest command:
npm run scq JournalYou'll find the Journal in your game's quests folder. Change it like this:
export function Journal() {
    return Quest({
        name: 'Find Joe\'s journal',
        status: (game: IGame, quest: IQuest, done: boolean) => {
            return 'You have ' + (done ? '' : 'not ') + 'found Joe\'s journal' + (done ? '!' : ' yet.');
        },
        start: (game: IGame, quest: IQuest, person: IPerson) => {
        },
        checkDone: (game: IGame, quest: IQuest) => {
            return quest.completed || game.activeCharacter.items.get(Items.Journal) != null;
        },
        complete: (game: IGame, quest: IQuest, person: IPerson) => {
            game.activeCharacter.items.delete(Items.Journal);
            game.party.currency += 5;
        }
    });
}
You can see that there are a number of elements to this. Apart from the quest name, there is an action you can run as soon as the quest starts. It is not used in this example. Further, there is a status
property, which can be either a static text or a function returning some text, which tells what the current status of the quest is. Here, it'll format a message telling you whether or not you found Joe's journal. Next, there is a function called to check whether the quest requirements are met called checkDone. It should return either true or false, depending on whether the player meets the quest requirements or not. Finally, the complete function will trigger when the quest is completed and the reward claimed. Joe will give the player some cash when the journal is returned to him.
For this quest, add a really simple quest item called Journal using npm run sci Journal and add it to the items array of the Basement location. Add the quest itself to Joe's quests array:
quests: [
	Journal()
]
We now need to enable the player to get the quest from Joe. We'll do that by adding a conversation reply and some nodes for the quest, like this:
<node name="return">
	<p>
	Back so soon?
	</p>
	<replies>
	...
	<reply node="lostjournal">
		I noticed you seem a bit upset.
	</reply>
	</replies>
</node>
<node name="lostjournal">
<p>
I guess I am. I can't seem to find my personal journal. It is very important to me. Can you help me find it?
</p>
<replies>
<reply node="pleasefindit" quest-start="Journal" set-start="foundjournal">
Of course. I'll return it as soon as I see it.
</reply>
</replies>
</node>
<node name="pleasefindit">
<p>
I hope you have better luck than I searching.
</p>
</node>
<node name="foundjournal">
<p>
Have you found my journal?
</p>
<replies>
<reply>
Not yet, sorry.
</reply>
<reply requires="quest-done=Journal" quest-complete="Journal" set-start="return">
Yes I have. Here it is!
</reply>
</replies>
</node>As you see, I used a few new reply attributes here, quest-start and quest-complete. These will trigger the start and complete functions of the quest whose name is specified, so the Journal quest in this case. Also, I added one of the quest-related requires attributes, in order not to show the reply that you found the journal until you actually have it in your possession. You can use the quest-start and quest-complete requirements to show replies only when you started or completed a specific quest.
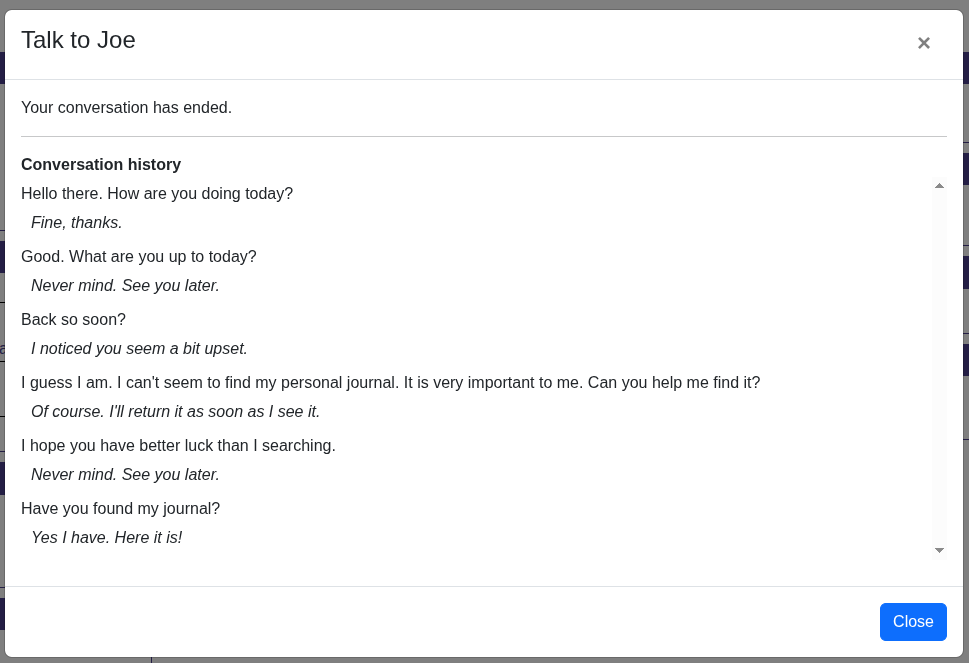
Now we have a nice quest ready for the player. He first has to talk to his friend and agree to help him. Then, he has to find the journal which is in the basement. To get in the basement, he needs a key. This key is in the possession of the bandit which he needs to defeat. Play the quest and return the journal to Joe. You should see something like this when you return to him:
Note that when you need to track progress on one of your quests, you can use the quest progress object. It is not typed, so you can add anything to it that you need. You can also check in code whether a quest is done by checking its completed flag.